Configuration
Sharing data among users
To share data among the users of JupyterHub, when installing or reconfiguring,
start by selecting a volume in the persistent storage field.
Then, navigate to the Configuration section and check the enabled
checkbox in the sharedData subsection.
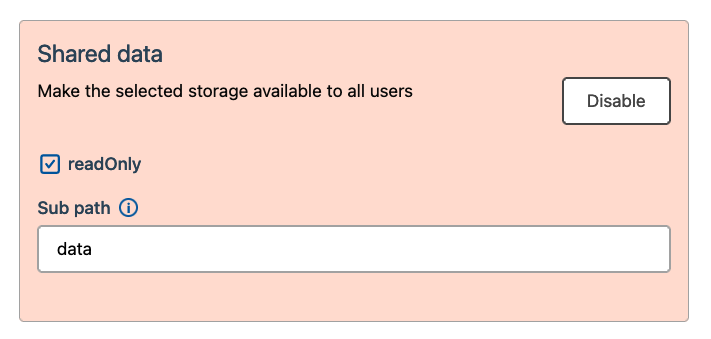
The shared data is by default not editable by other users, but you can enable
this by unchecking the readOnly checkbox. Note that this will allow any
users to add files or edit existing files.
If you want to mount a subfolder in the persistent storage, specify the path
to the subfolder in the subPath field. Note that this path is relative to
the root of the persistent storage.
Usage
Accessing the admin panel
Jupyterhub allows you to administer and access the notebooks that are associated with the Jupyterhub server. This can for instance be useful in order to help users with debugging, or shutting down notebooks that use a lot of resources.
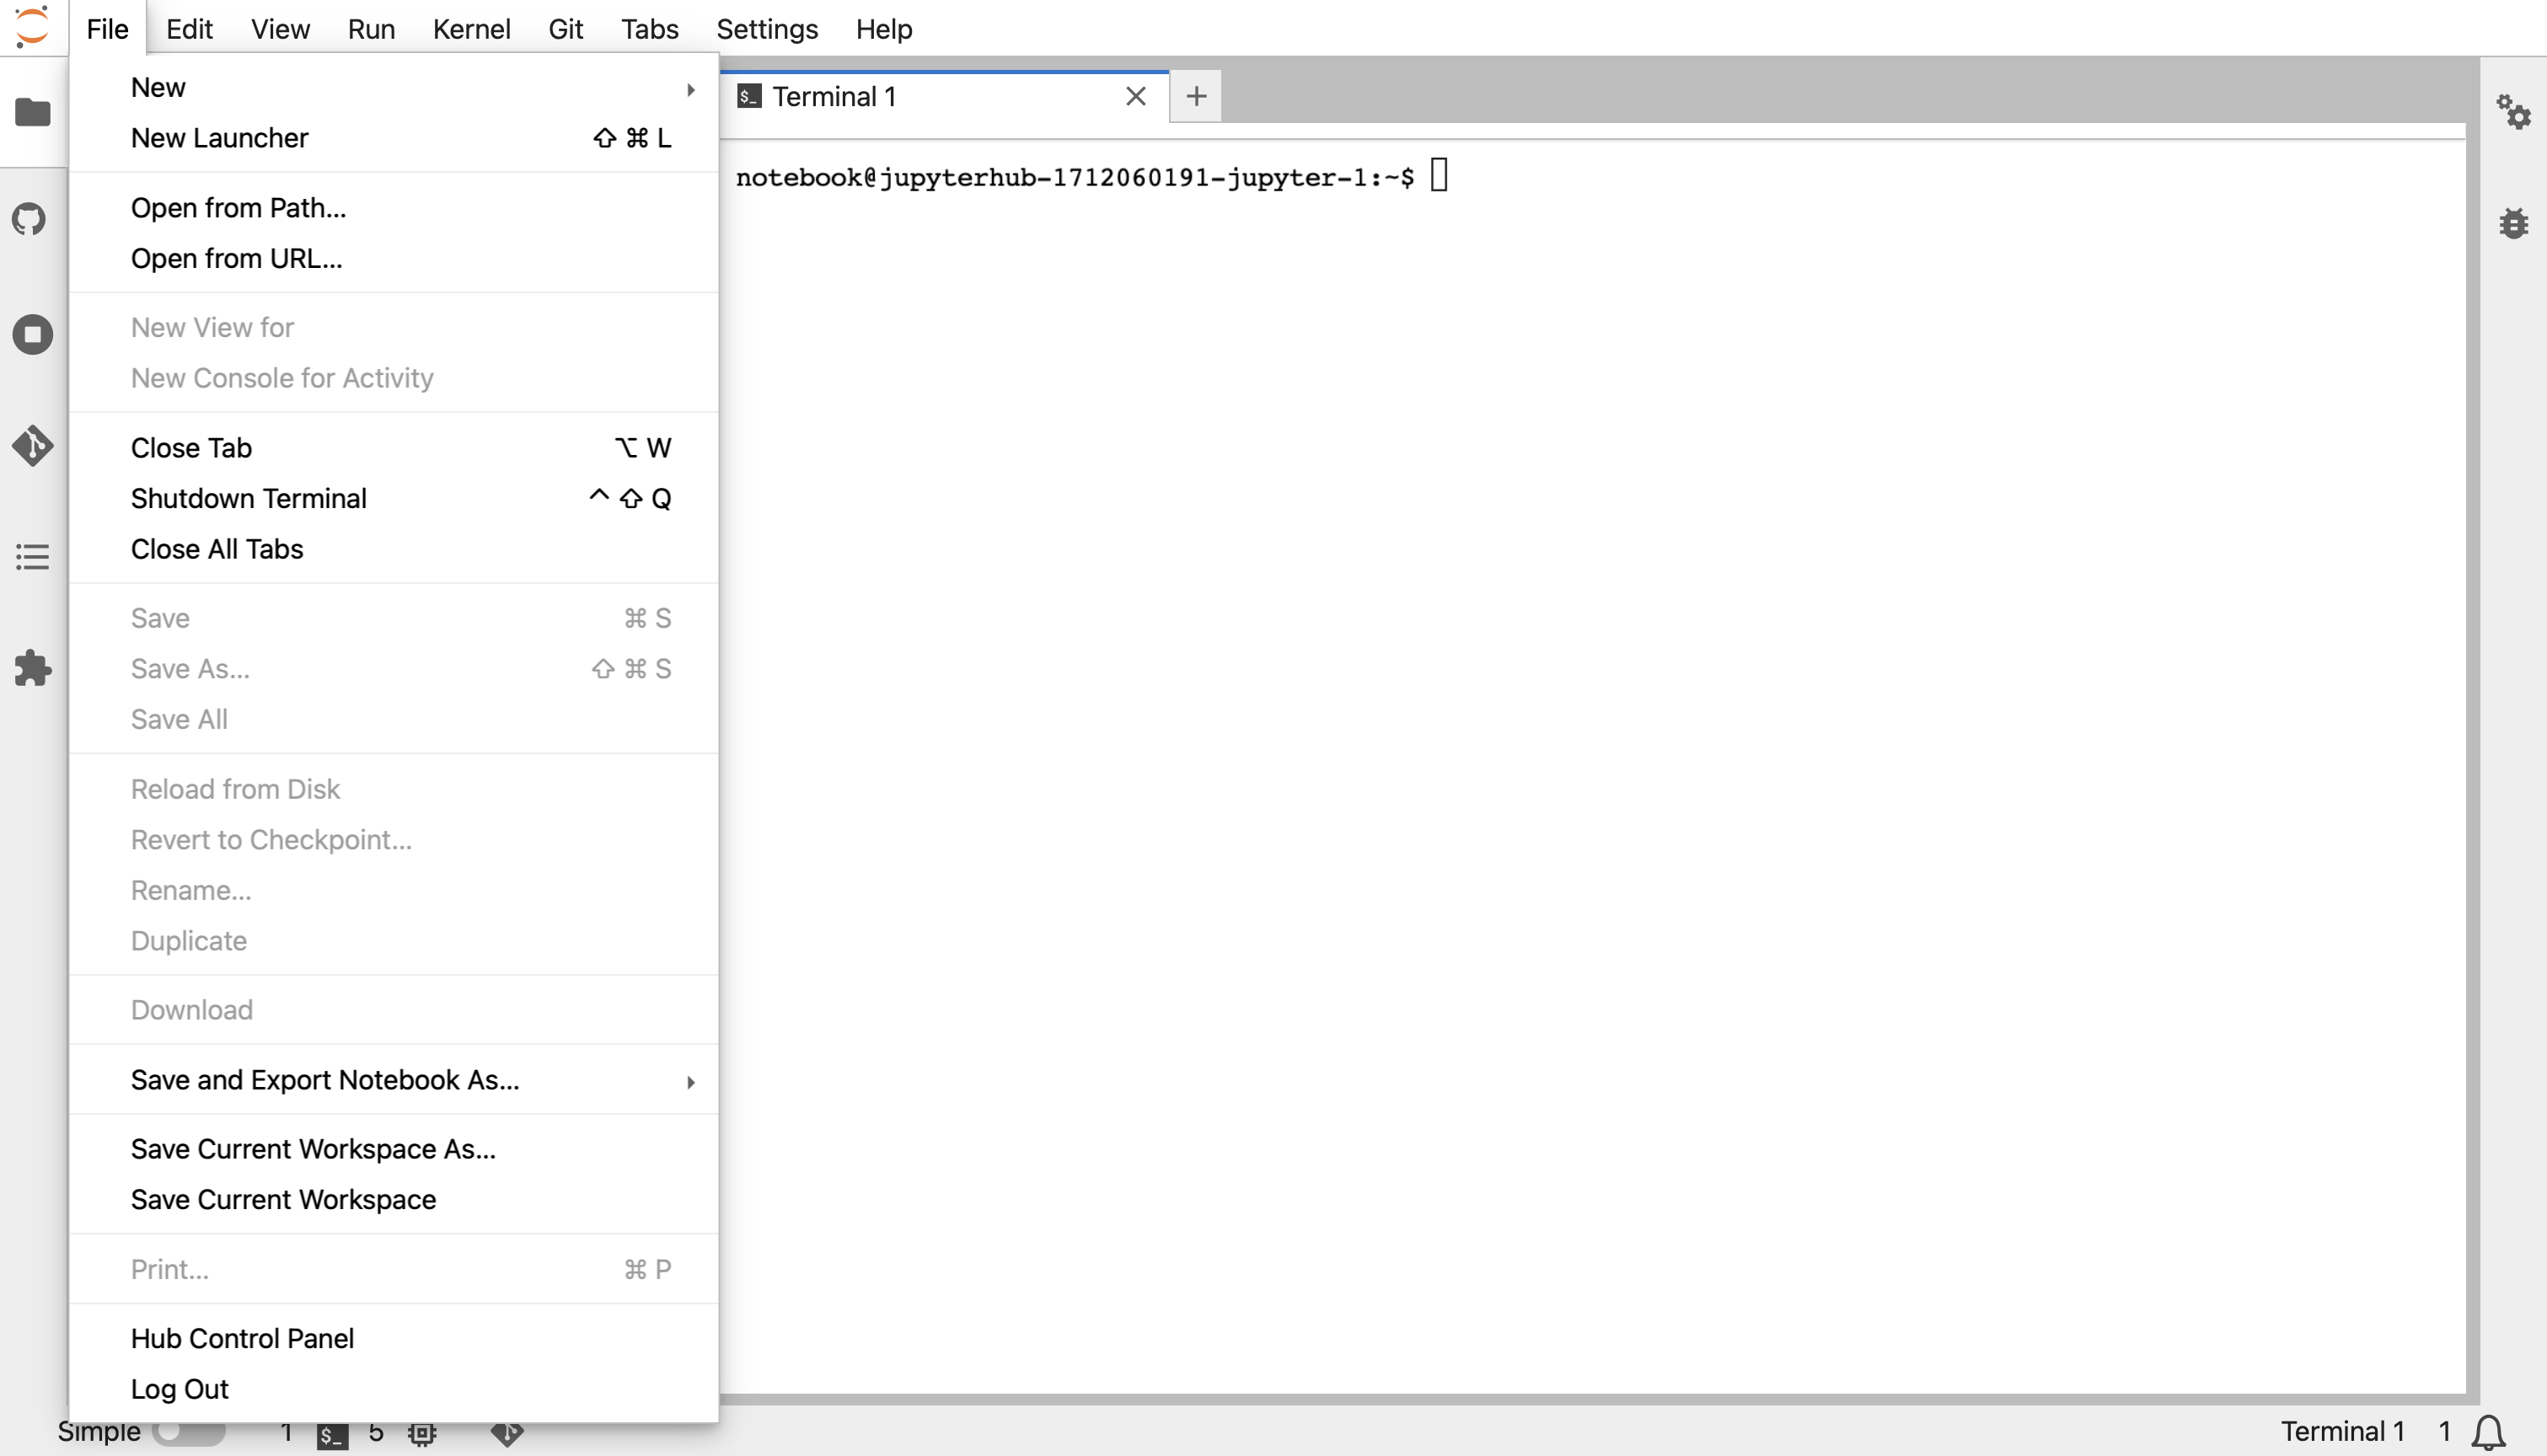
To access the admin panel, begin by navigating to the Hub Control Panel which
should be in File menu dropdown in the JupyterLab.
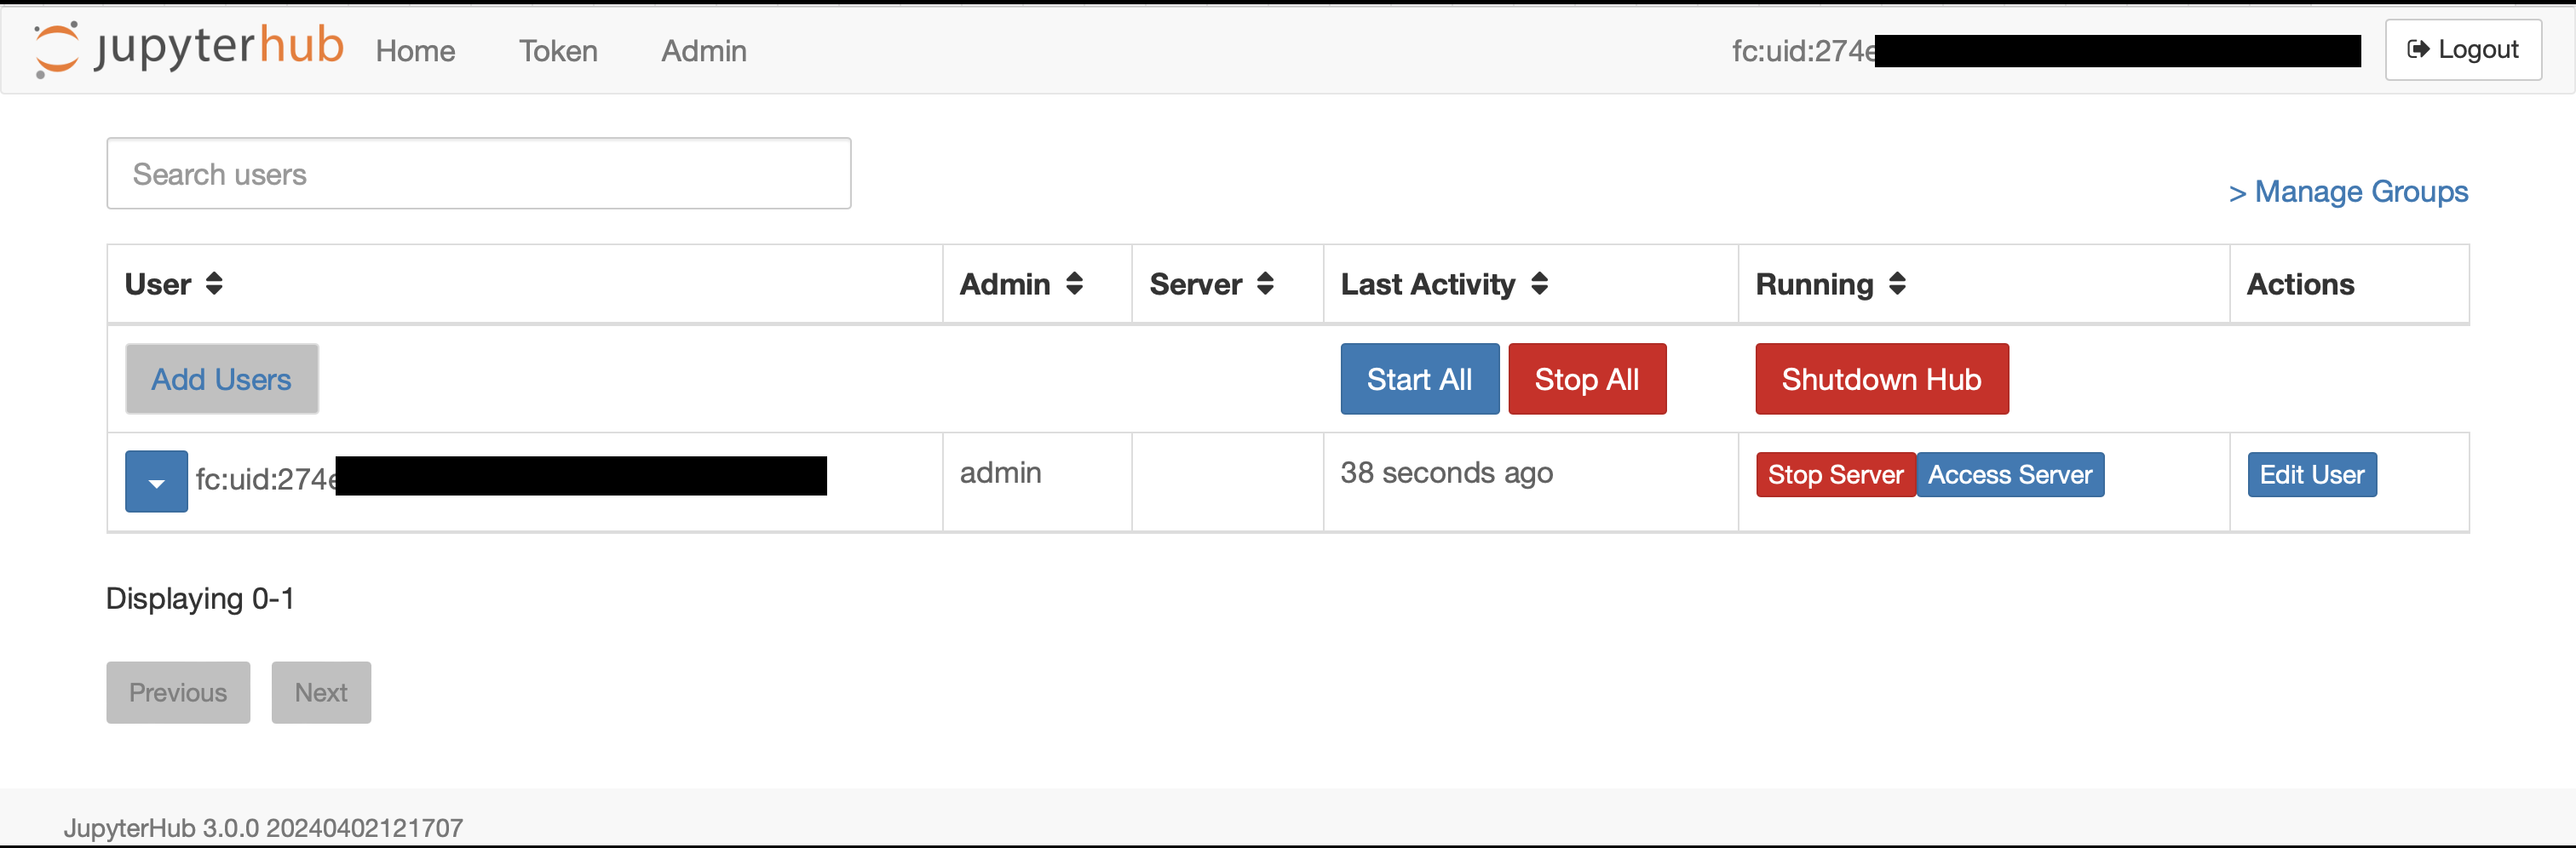
Then, click on the Admin tab in the navigation bar. This tab should be on
the left side of the navigation bar.

You should then be taken to a page which allows you to add new users, stop, access and edit the notebooks of individual users, as well as shutting down the Hub.
How to add new packages
In case you are missing some packages from the default application image, you can add those packages yourself by creating a custom docker image. See this tutorial for generic instructions on how to add packages.
After having read the tutorial above, you can use the dockerfile below as a starting point when creating the dockerfile that adds new packages.
# See the value of userImage in
#
#   https://github.com/UninettSigma2/helm-charts/blob/master/repos/stable/jupyterhub/values.yaml
#
# to determine the latest base image

FROM sigma2as/jupyterhub-singleuser:<use latest tag here>

# Install system packages
USER root
RUN apt update && apt install -y vim

# Install other packages
USER notebook
RUN pip install scikit-learn